BirdNET is real-time acoustic bird classification system for the Raspberry Pi 4B, 3B+, and 0W2 built on the TFLite version of BirdNET. BirdNET is an AI algorithm developed by a a joint project of the K. Lisa Yang Center for Conservation Bioacoustics at the Cornell Lab of Ornithology, and Chemnitz University of Technology.
This BirdNET listening station includes the following features:
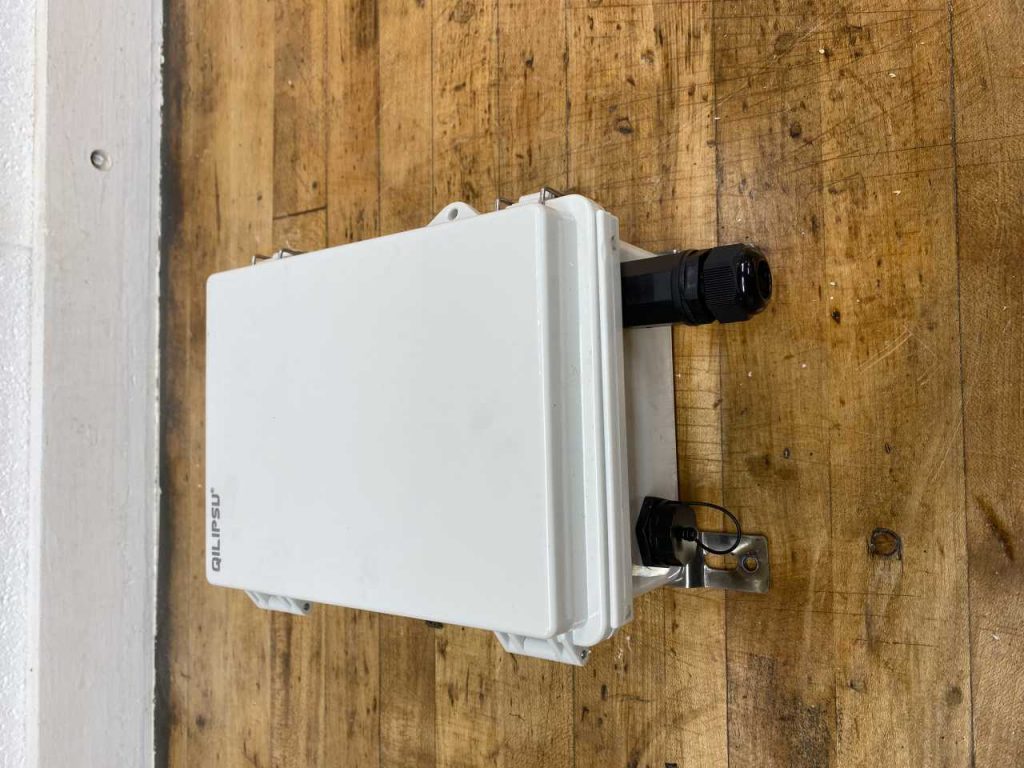
Waterproof outdoor enclosure with external PoE (Power over Ethernet) Ethernet port
Weatherproof external USB Mic port.
24/7 recording and BirdNET-Lite analysis.
Bird identification by analyzing spectrograms.
Spectrograms available for all extractions.
Data and analysis viewed using a standard web browser.
Live streaming audio.
BirdWeather integration.
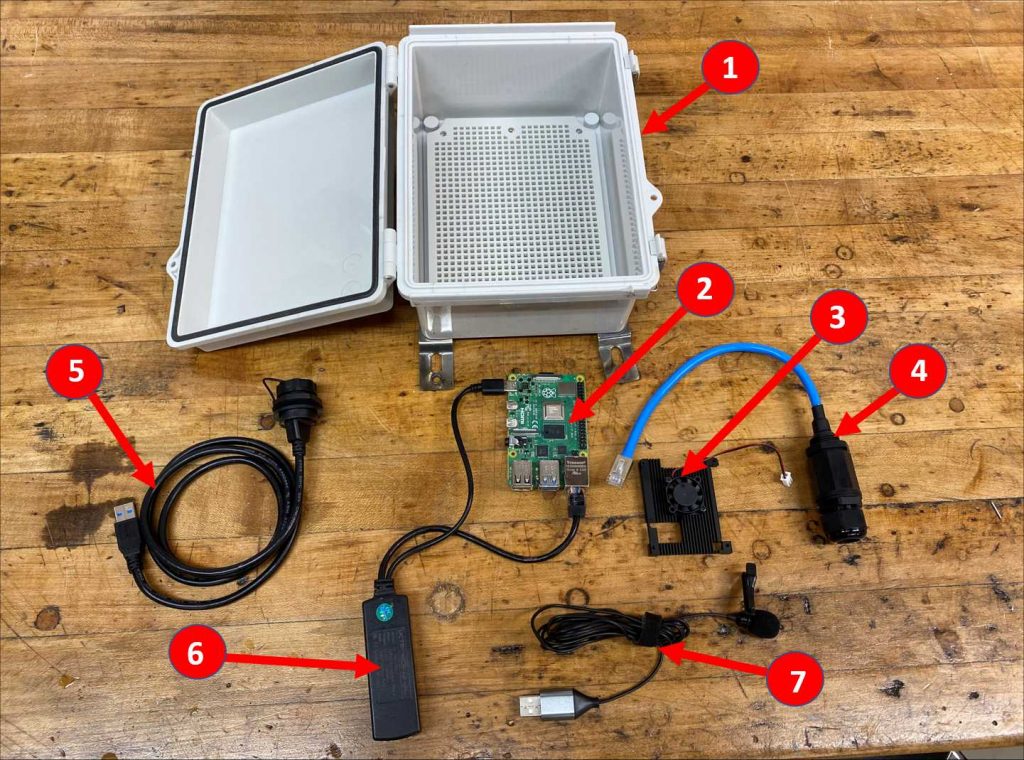
This post will cover how you can build your own BirdNET system for discovering the birds in your backyard that you never knew were there! Below are a list of items you will need to build your own BirdNET station.
Total cost to build a Bird-Pi system is around $125.
Step 1
Before you start assembling the BirdNET system you will need to copy the BirdNET-Pi software on to your 64Gb micro SD card. Click here for the Installation Guide.
Step 2
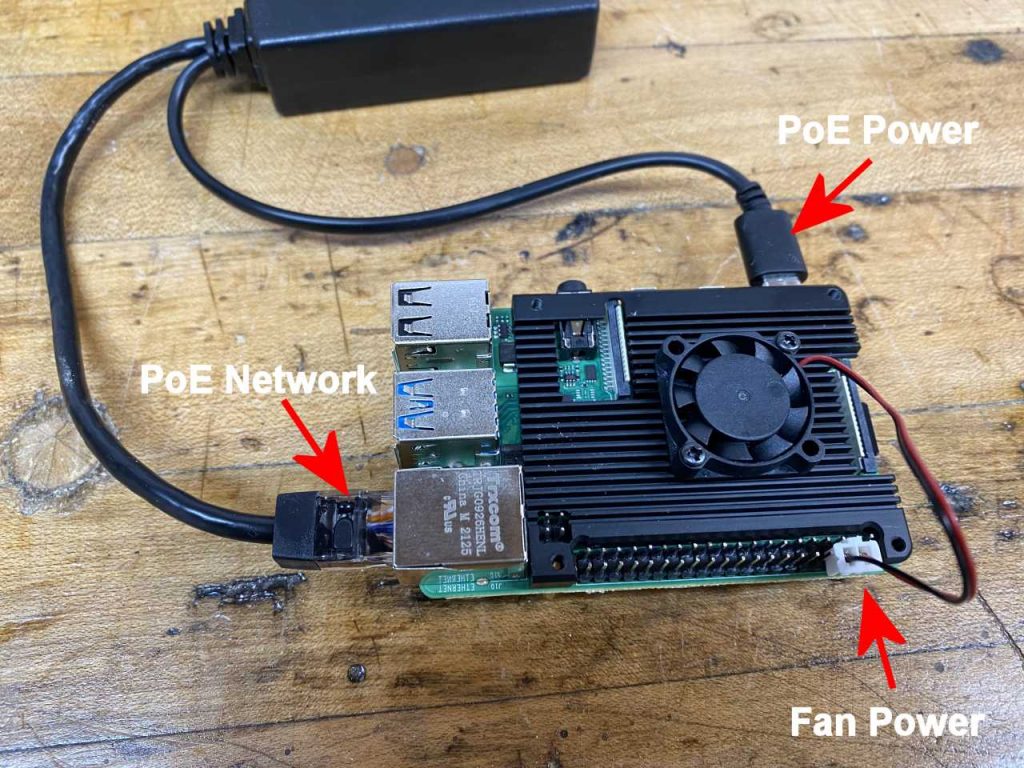
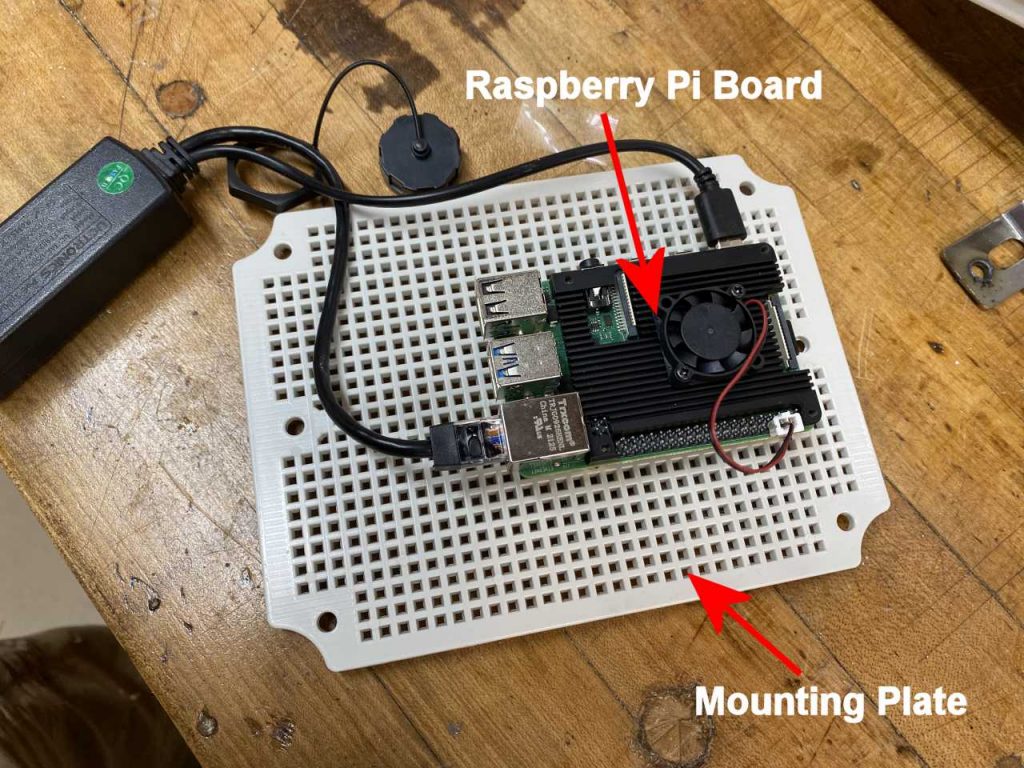
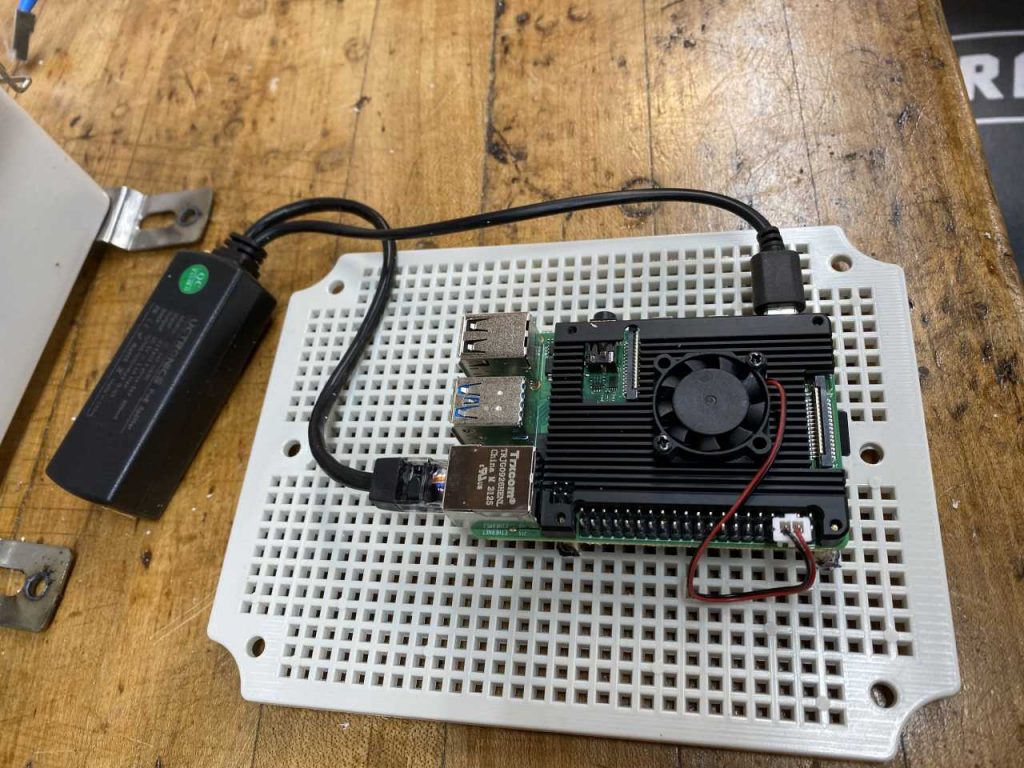
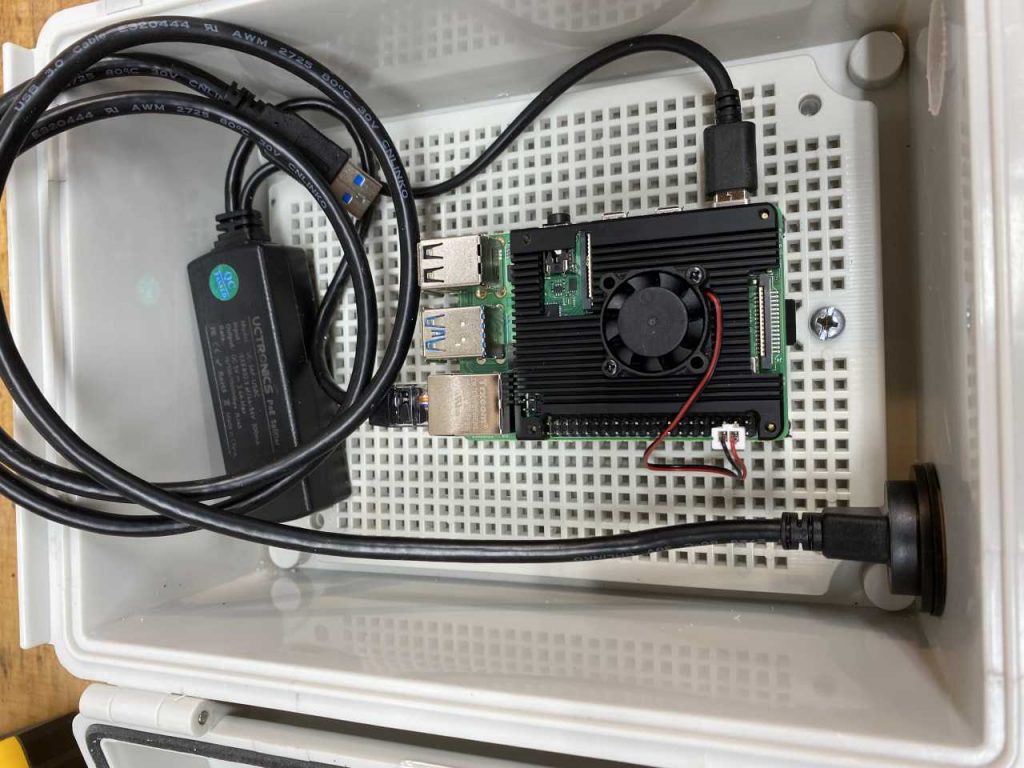
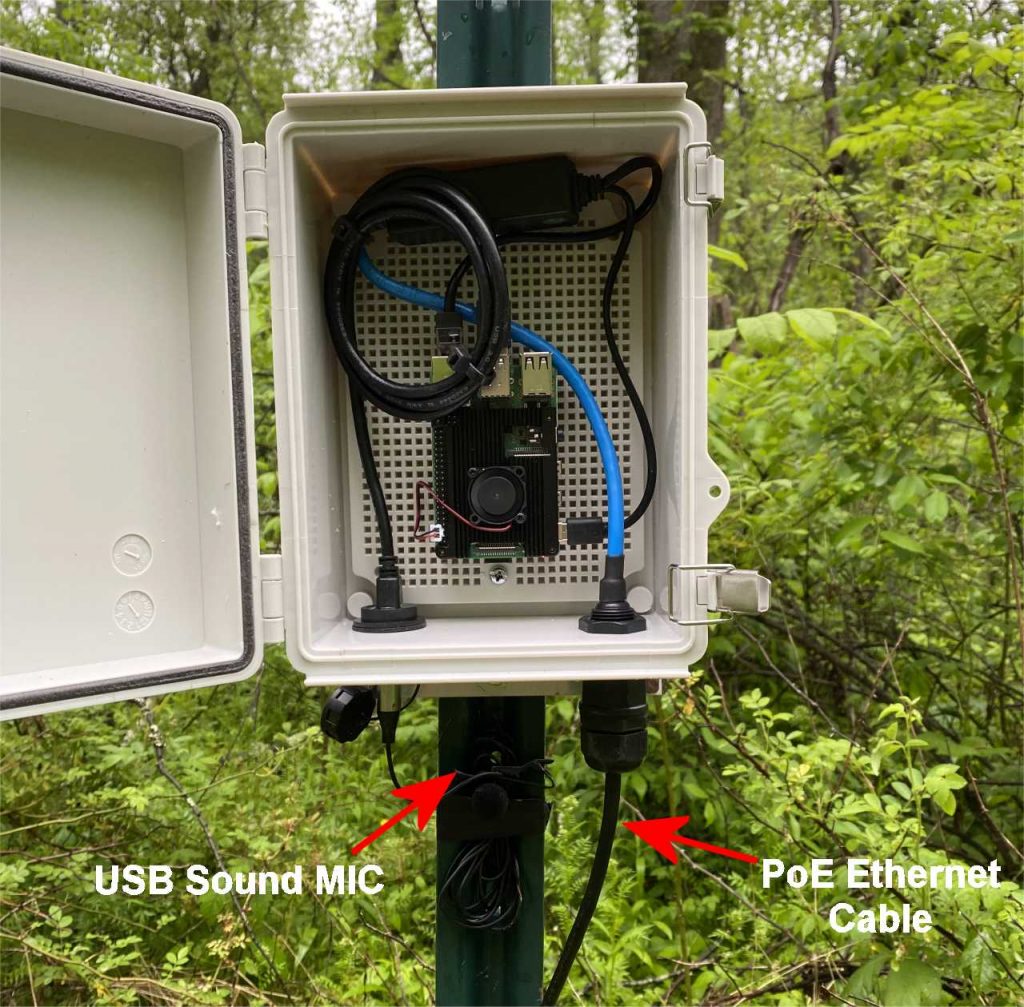
Plug in the PoE adaptor into the Raspberry Pi power port and ethernet port as shown below. Then install the fan using the longer brass hex spacer screws that come with the fan kit.
Step 3
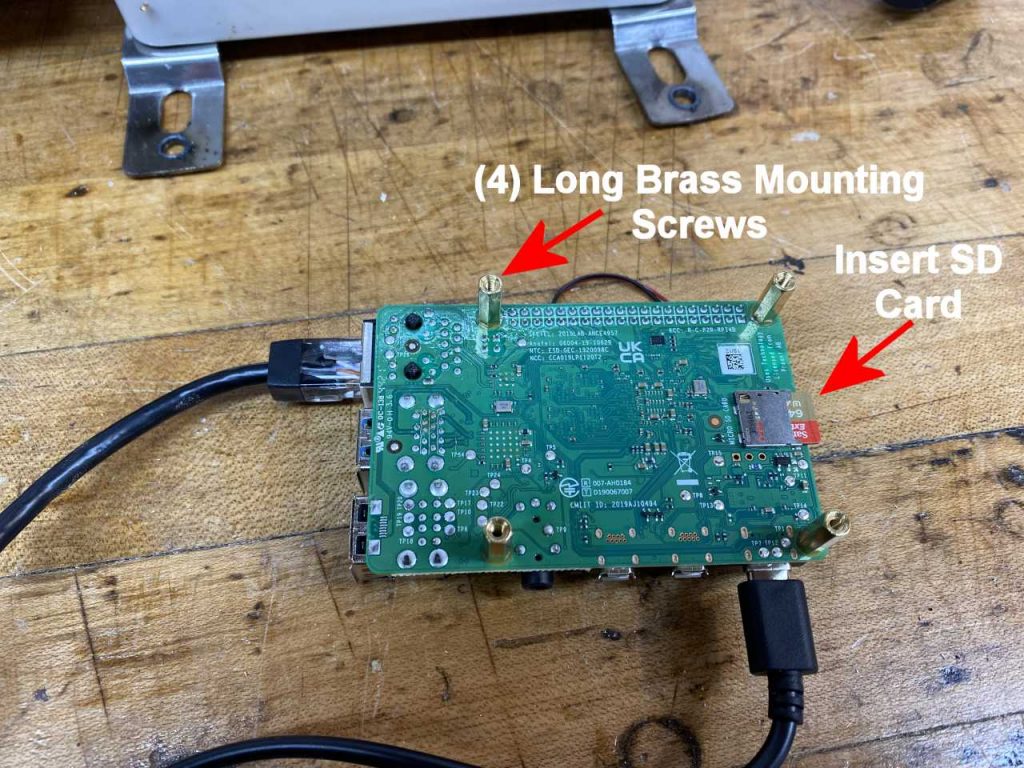
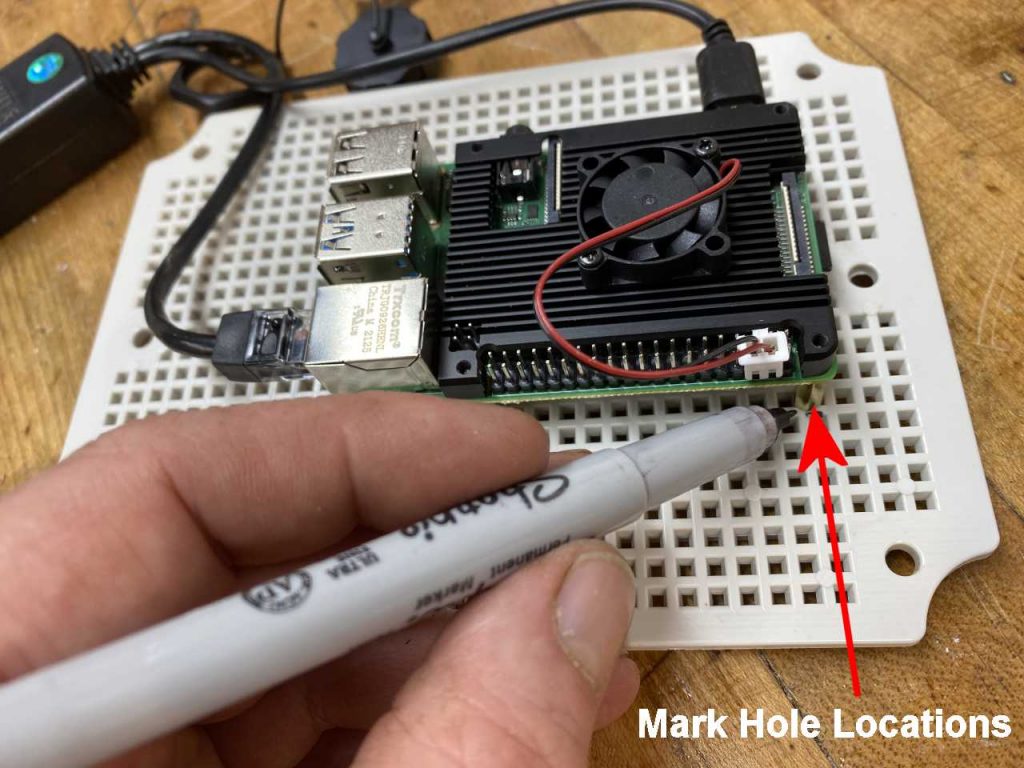
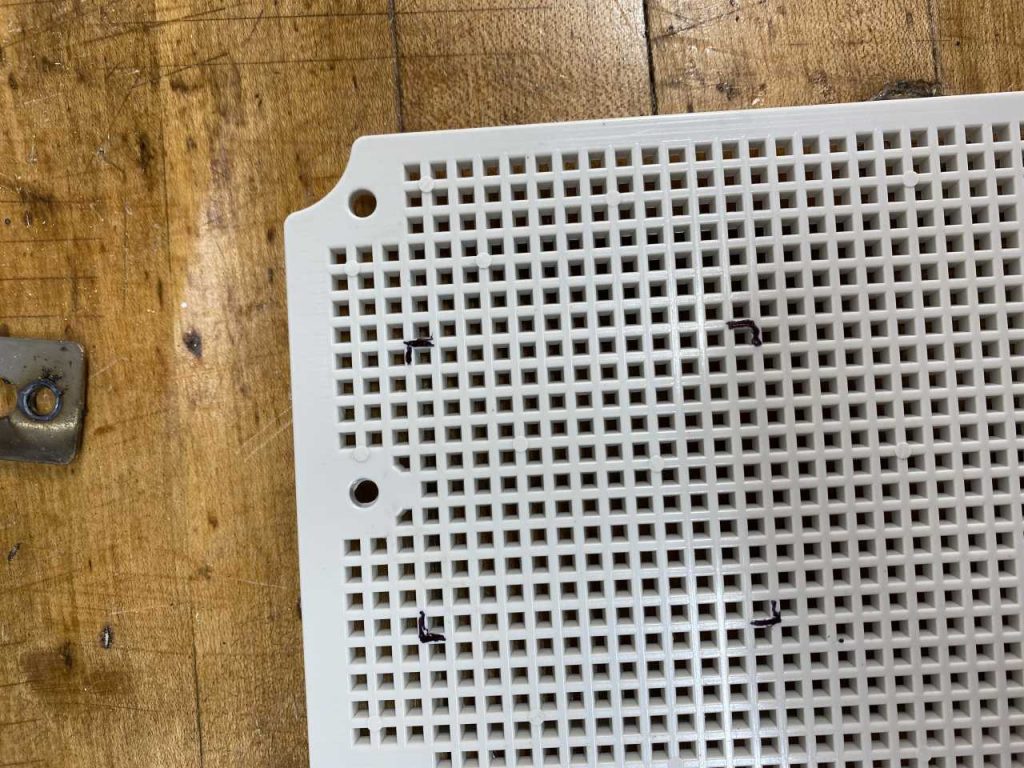
Mount the Raspberry Pi board to the enclosure mounting plate. Place the Raspberry Pi board in the location shown below and mark the locations of the brass hex spacer screws. Use a 1/8″ drill bit to drill out the hole locations and mount the board with the long black machine screws that came with the fan mounting kit.
Step 4
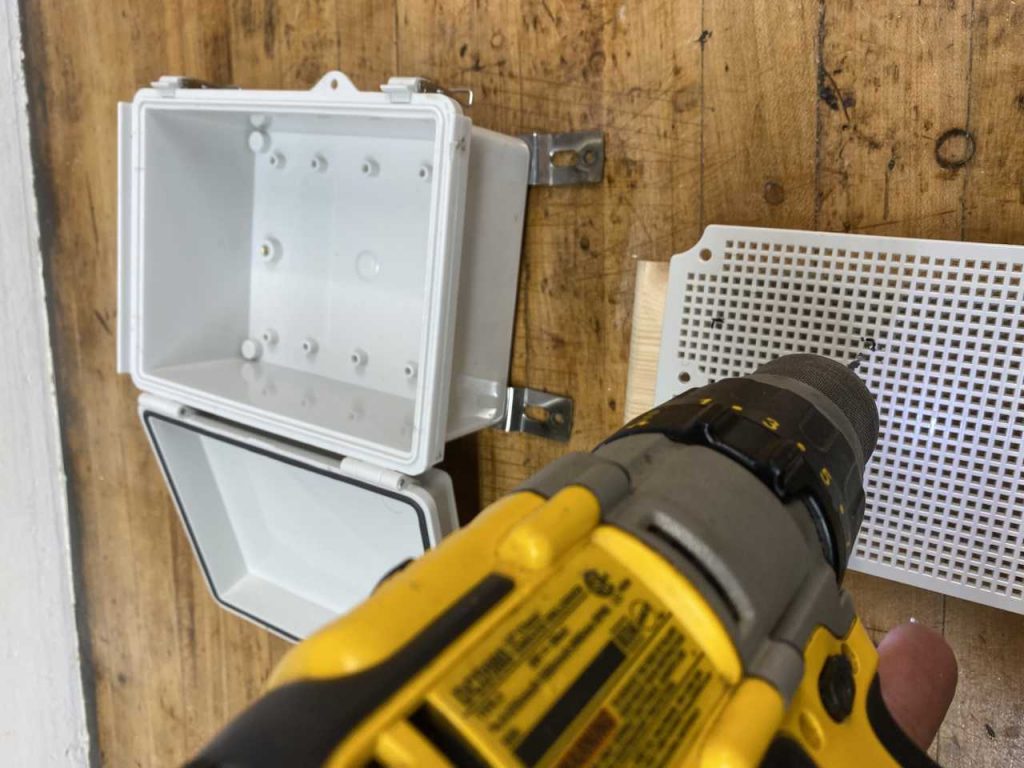
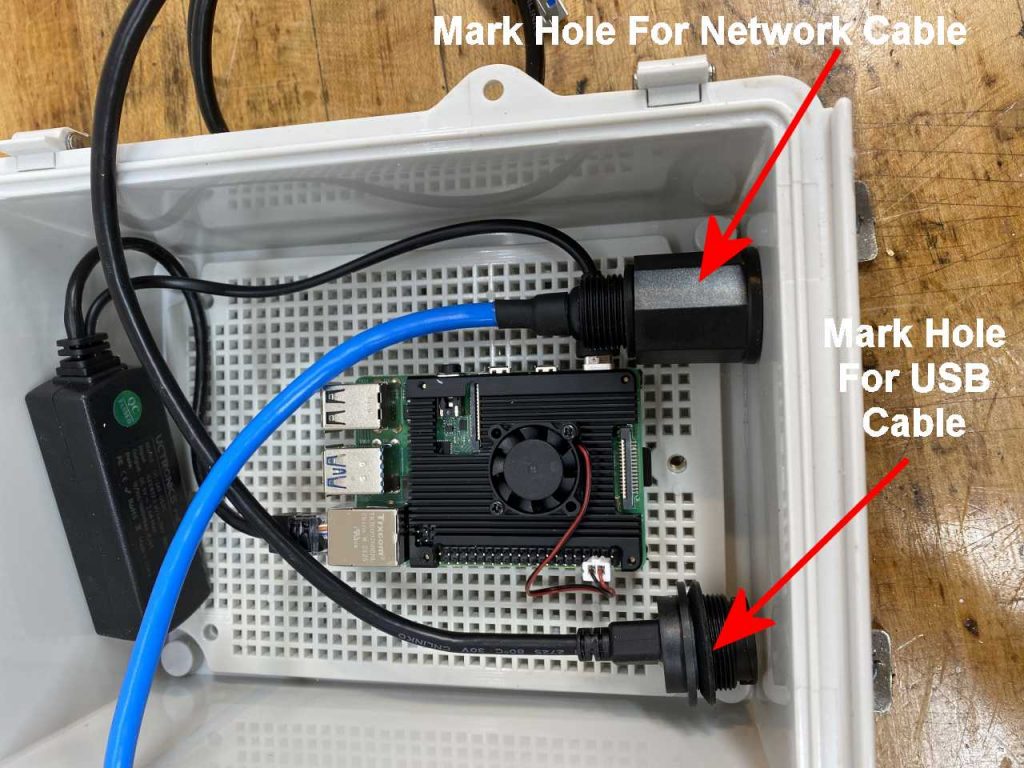
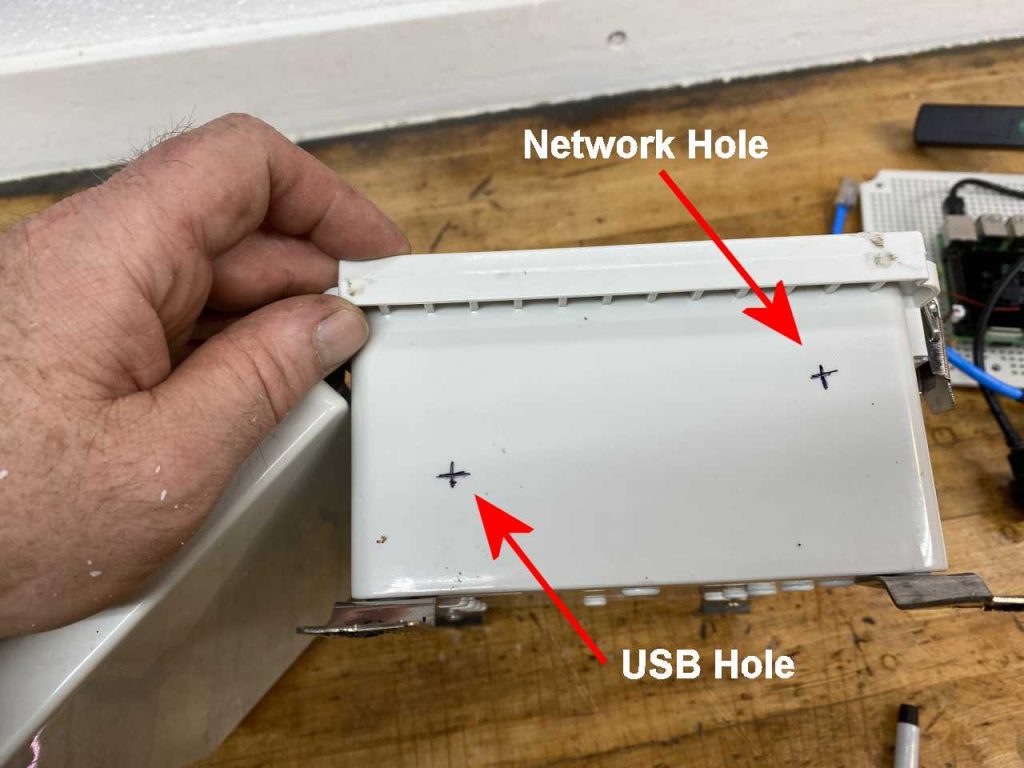
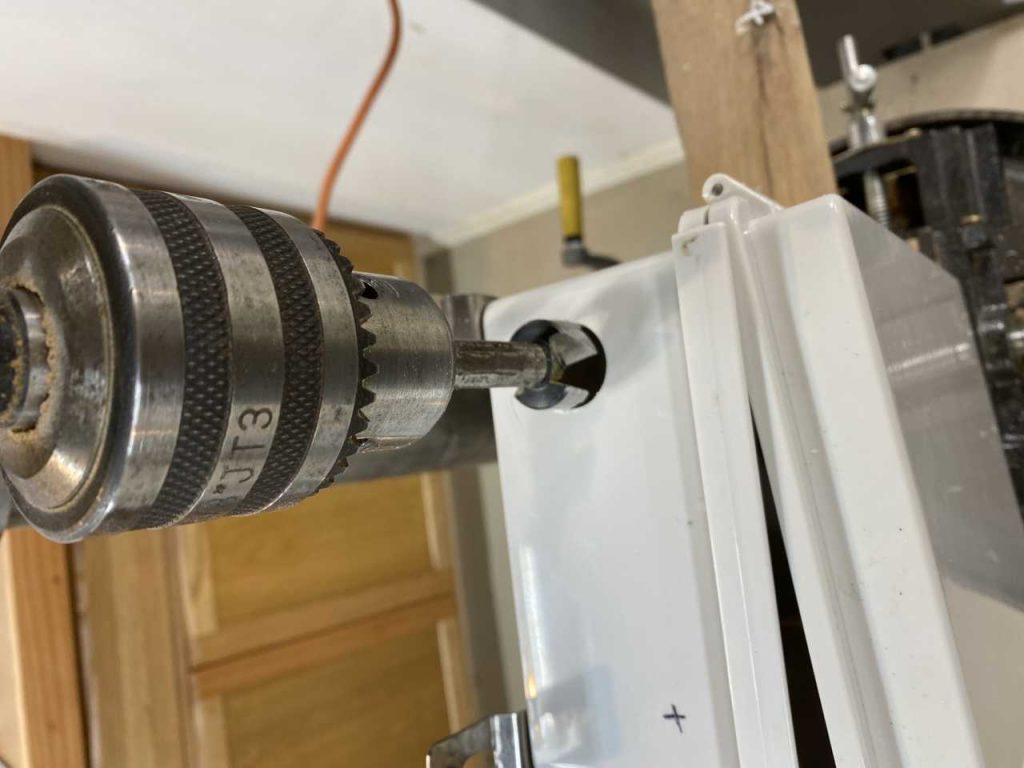
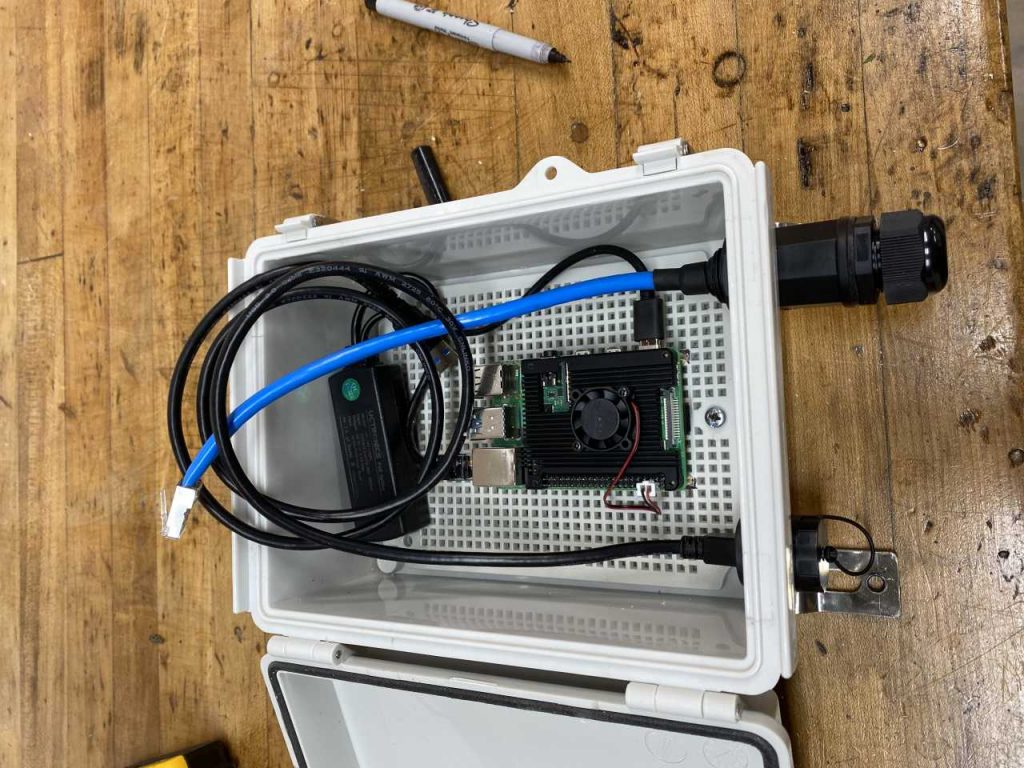
Next, mount the external PoE Ethernet cable and external USB cable in the waterproof box. Note the locations of the holes for both below. Use a 7/8″ drill bit for the USB connector and a 3/4″ drill bit for the Ethernet connector. We have found the forstner bits work best for this type of hole.
Step 5
Insert the USB and Ethernet cables into the drilled out holes.
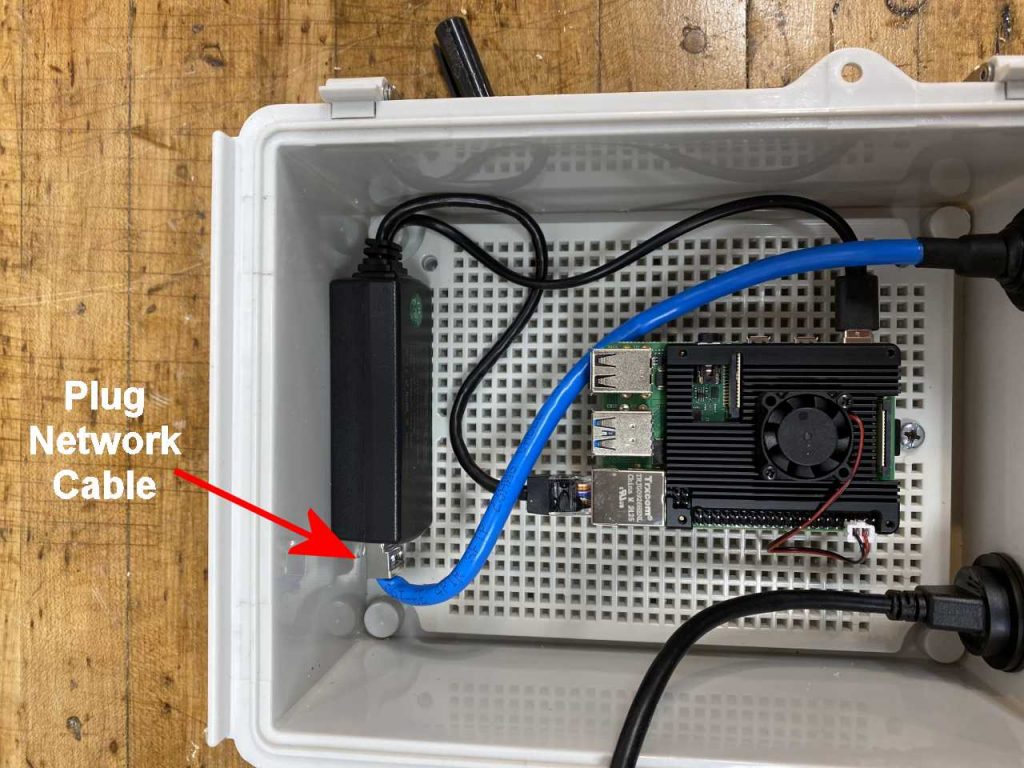
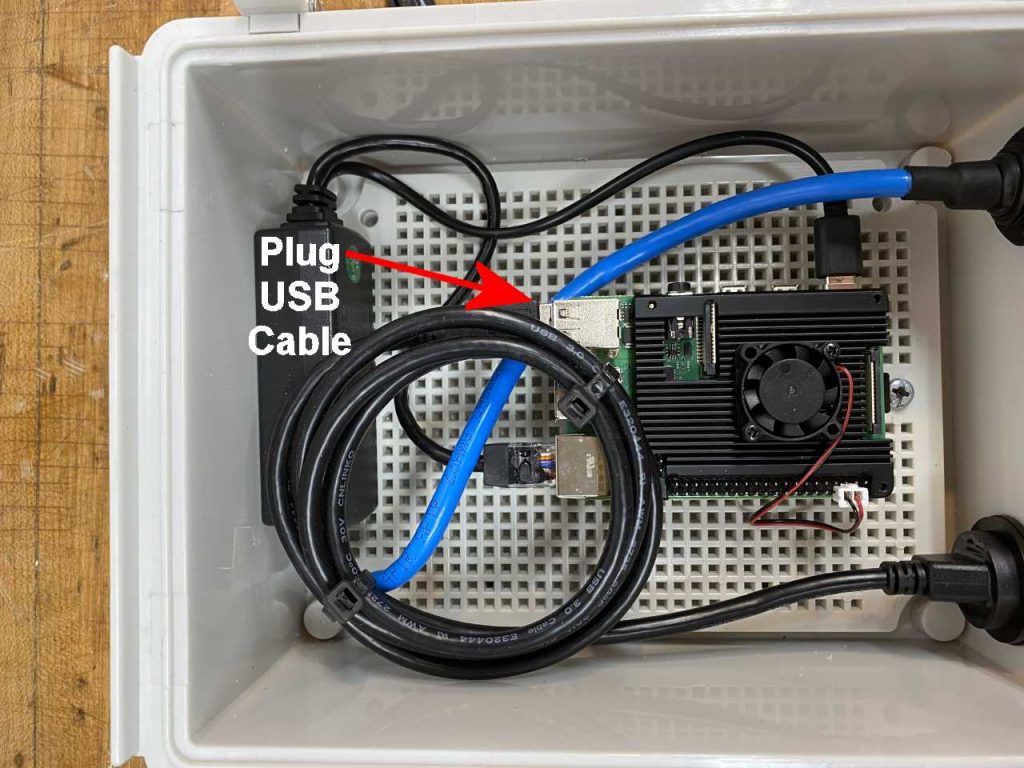
Step 6
Plug the Ethernet cable into the PoE adaptor and plug the USB cable into the USB port on the Raspberry Pi board as shown below.
Complete!
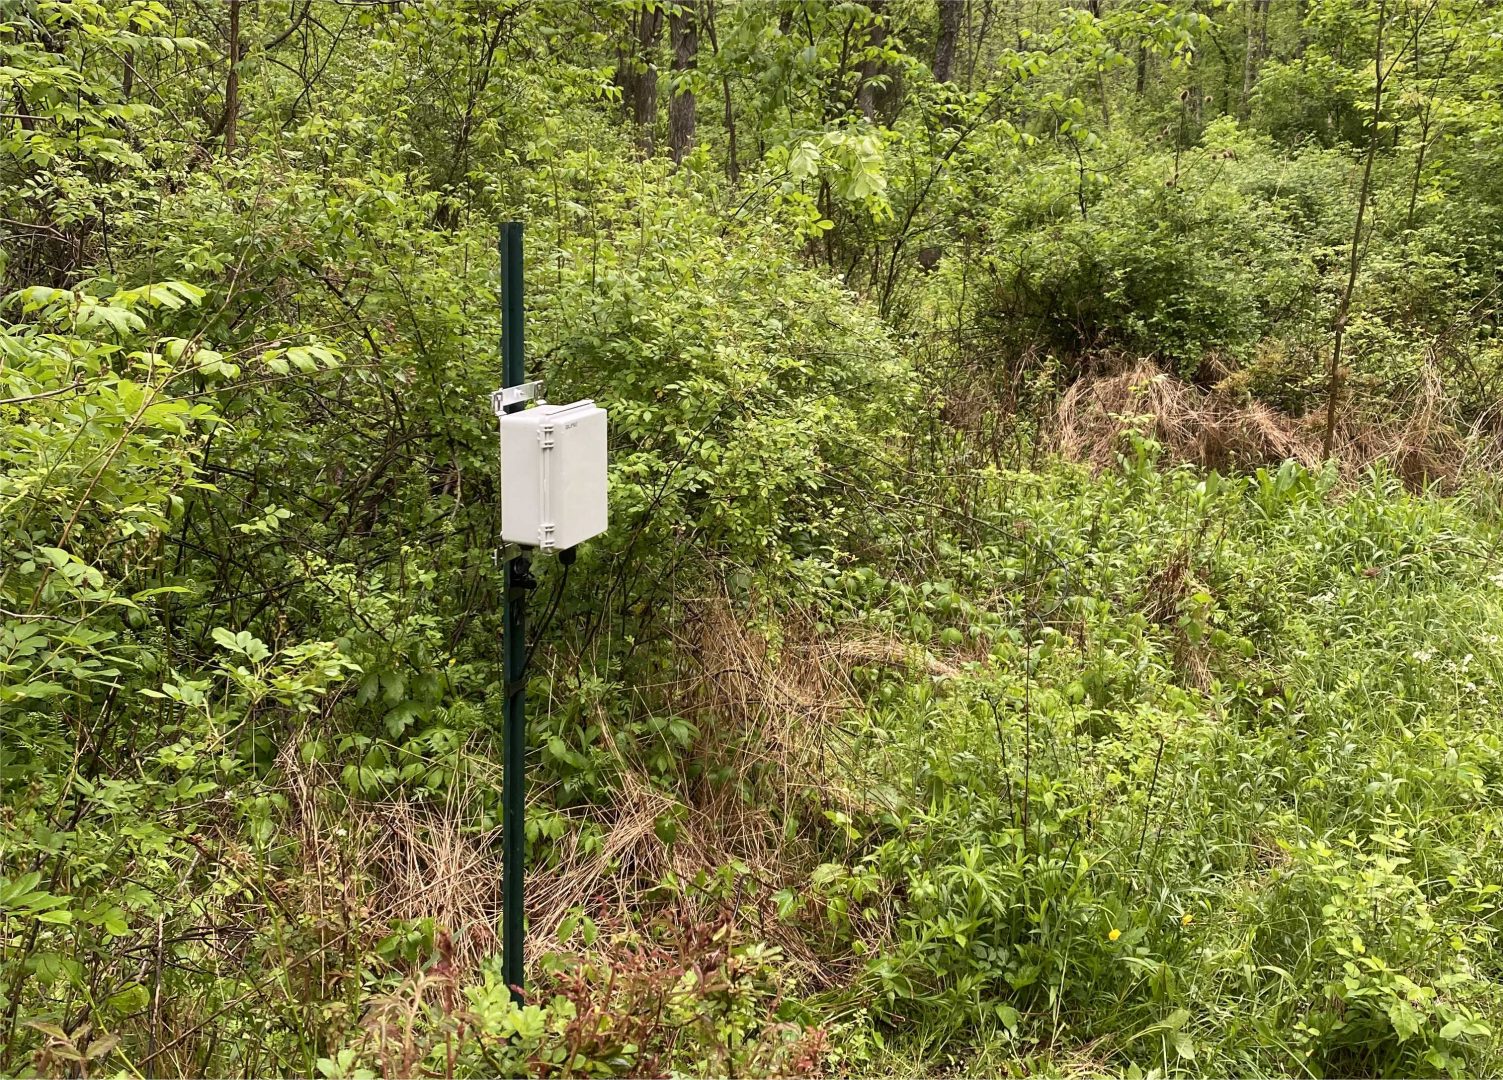
Congratulations! You have completed the BirdNET listening station. Below is an example of the BirdNET station mounted in the field. You can see the live data here: http://pixbirdnet1.hopto.org
This BirdNET station is powered by a PoE Ethernet cable. This requires you to run an Ethernet cable to the BirdNET box. In order to power the unit you will need to install a PoE injector at your switch or router or use a PoE switch. Here are some links for these parts you can purchase on Amazon.
I just like the helpful information you provide in your articles
saddles
2 years ago
I truly appreciate your technique of writing a blog. I added it to my bookmark site list and will
GlucoRelief reviews and complaints
2 years ago
Very well presented. Every quote was awesome and thanks for sharing the content. Keep sharing and keep motivating others.
Chance
2 years ago
This is a great build. I’m curious as to how you could build a unit that can be deployed remotely and having the unit save the data to itself until you pick it back up. Basically a battery powered unit. Any thoughts?
Yes, you can set the Raspberry Pi up for WiFi during the installation of the software
Juha Laitila
1 year ago
What about temperatures inside of the box? Im intrested to create something similar, with installing 30w power adapter 230v->5v inside of the box, so can use normal house-electric-socket to connect electric. Just thinking if there should be some air-holes to prevent overheating inside. Of course then there would be issues with humidity.
Yes, if you place it under the box like I did it will work for years.
Todd
1 year ago
Thank you very much for the wonderful article it has really helped me. I am very curious how the set up has worked through the year. Particularly how the microphone has held up in weather conditions. Thank you again
Thank you very much — I used your build plan to make a bird station for my wife for Christmas! I did mine with wired power (USB-C) and wireless internet since it’s mounted on the back of our house. I even got a handy waterproof connector that has both USB-A and USB C in a single penetration.

How is the microphone ‘waterproof’ ?
We install the microphone under the case away from weather conditions. This has worked well for us.
I just like the helpful information you provide in your articles
I truly appreciate your technique of writing a blog. I added it to my bookmark site list and will
Very well presented. Every quote was awesome and thanks for sharing the content. Keep sharing and keep motivating others.
This is a great build. I’m curious as to how you could build a unit that can be deployed remotely and having the unit save the data to itself until you pick it back up. Basically a battery powered unit. Any thoughts?
The system could be designed to run from battery power/solar charging. It could be connected to a cellular gateway for remote access as well.
Your blog has helped me through some tough times and I am forever grateful for your positive and uplifting content
Would it be possible to run this via wifi rather than ethernet?
Yes, you can set the Raspberry Pi up for WiFi during the installation of the software
What about temperatures inside of the box? Im intrested to create something similar, with installing 30w power adapter 230v->5v inside of the box, so can use normal house-electric-socket to connect electric. Just thinking if there should be some air-holes to prevent overheating inside. Of course then there would be issues with humidity.
The box design above works in any weather conditions we have tested it under. That’s from air temperatures approaching 100F and down to -10F.
Has it continued to work despite the weather?
Yes, if you place it under the box like I did it will work for years.
Thank you very much for the wonderful article it has really helped me. I am very curious how the set up has worked through the year. Particularly how the microphone has held up in weather conditions. Thank you again
[…] Build a BirdNET-Pi Listening Station […]
[…] Build a BirdNET-Pi Listening Station […]
Thank you very much — I used your build plan to make a bird station for my wife for Christmas! I did mine with wired power (USB-C) and wireless internet since it’s mounted on the back of our house. I even got a handy waterproof connector that has both USB-A and USB C in a single penetration.
Thanks great! Thanks for letting us know. Hope your wife enjoys it.