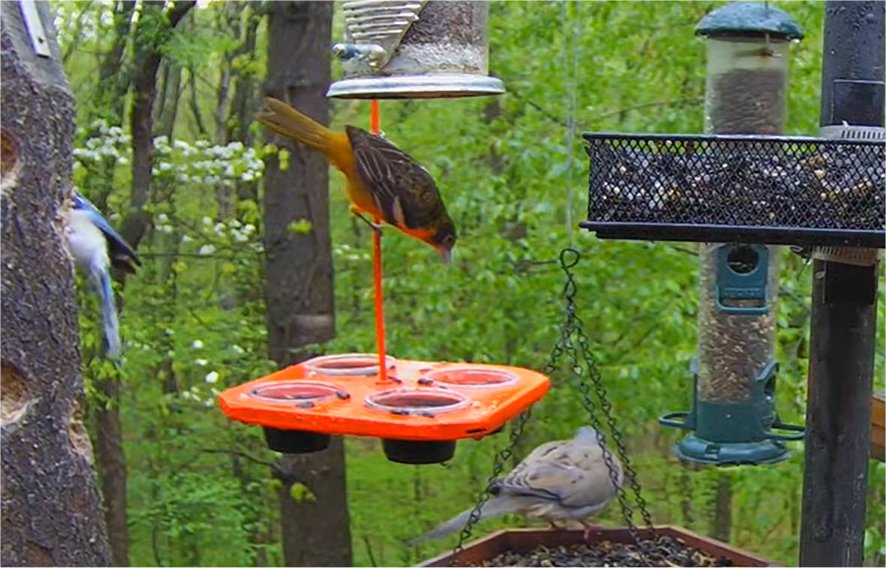
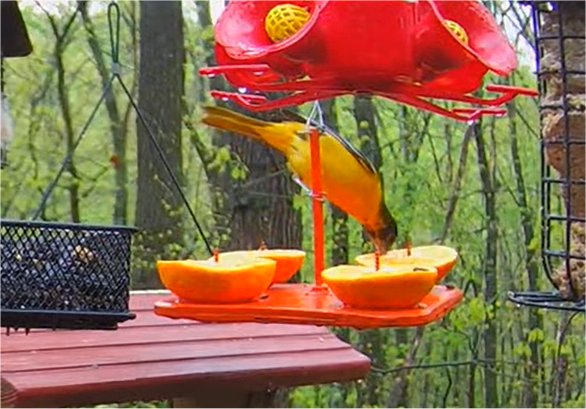
The spring migration is one of our most active times at our PA Bird Feeder 2 feeding station located in the woods of Southwestern Pennsylvania. Usually around the last week in April and first week in May the rose-breasted grosbeaks, ruby-throated humming birds, and Baltimore orioles start showing up at this feeding station.
For the past several years we have had great success at attracting the Baltimore orioles with a simple oriole feeder we constructed from simple building materials, and you can too!
We have found that many of the commercial oriole feeders you find in some of the popular bird feeding stores just do not work very well. Orioles like to feed from a stem or rod. We feel this is a more natural way of feeding for this bird. Our homemade feeder mimics this type of preferred feeding behavior.
We show two design of this feeder. The first is for a jelly feeder. We have found that grape jelly has worked best for us for the orioles. We buy the squeeze bottles of grape jelly from the Dollar Story. You can also make a feeder to hole the traditional orange slices. We find the orioles will feed from the orange slices at the beginning of the season but will not longer feed from them once summer approaches. We manage to keep 2 – 3 oriole pair feeding here and nesting. They will bring their young to the feeders before migrating south at the end of summer.
One question we often get asked is what about rain and why don’t you have a cover over the feeder to prevent the rain getting into the jelly cups. We actually water down the jelly so this has never been an issues for us. We feel the covers or roofs over many oriole feeders hinder their ability to land and feed naturally.
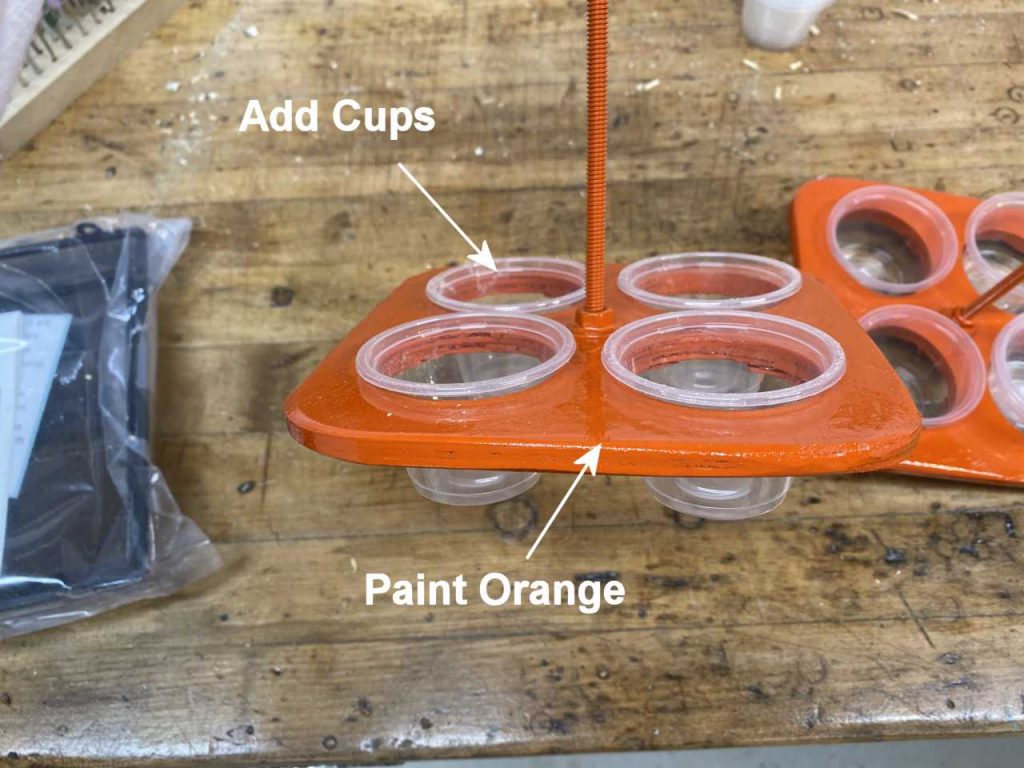
Below are step-by-step instructions how you can make your own oriole feeder for the spring migration at your feeders. Here are the materials you will need:
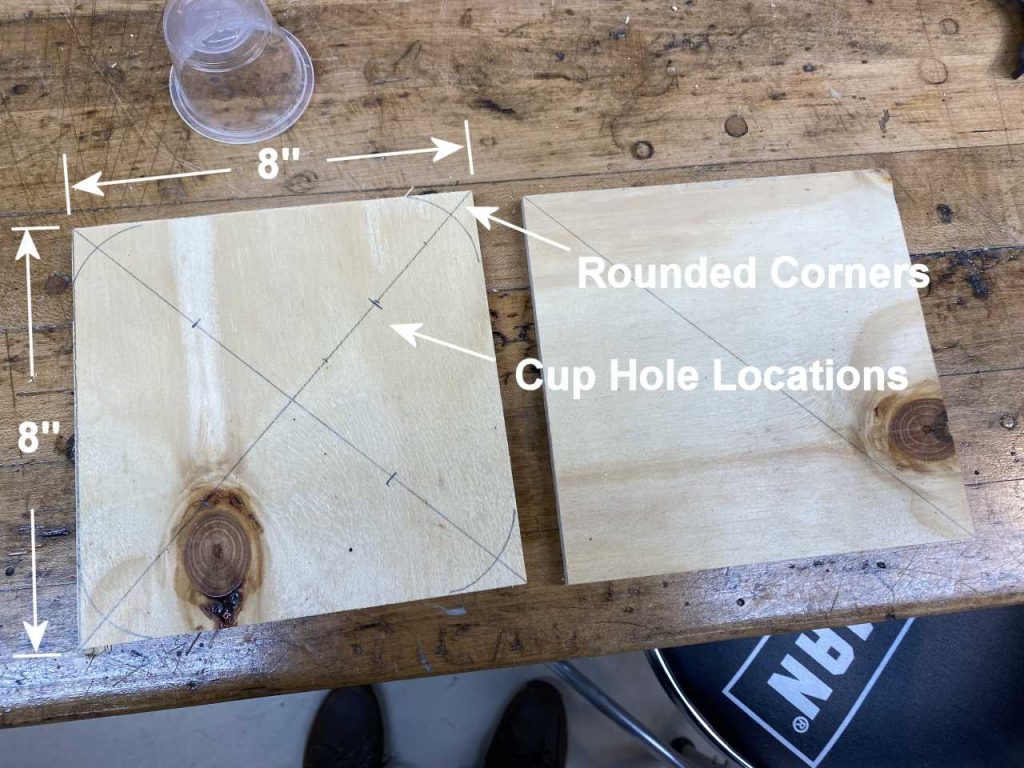
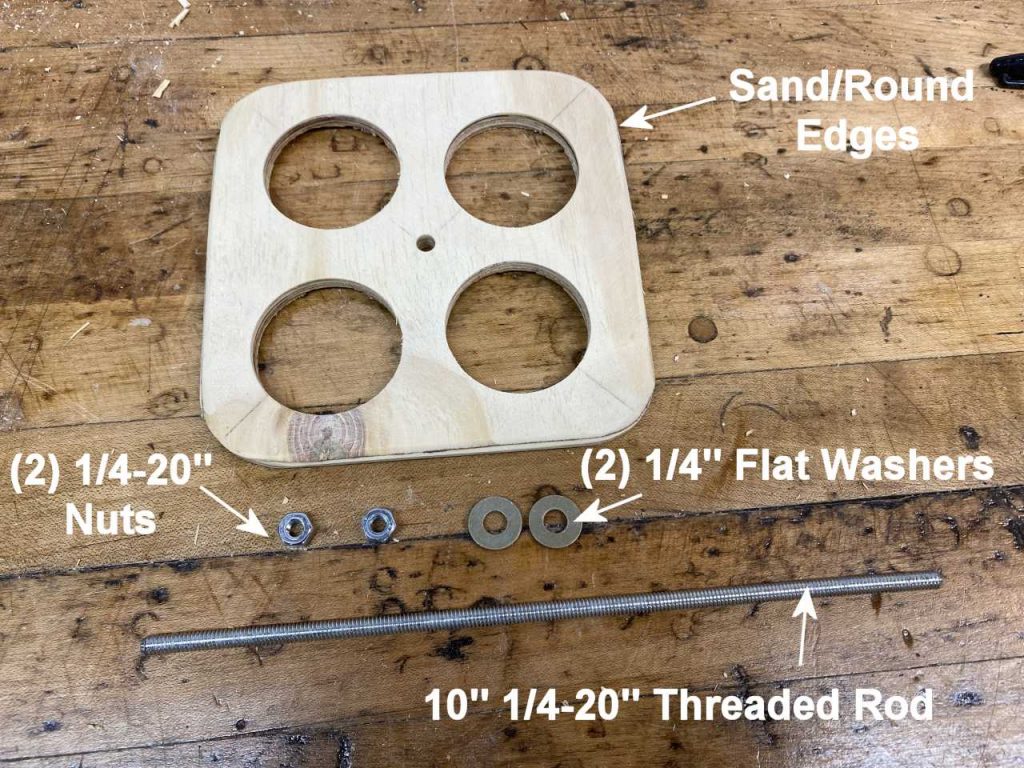
Small 8″ x 8″ piece of 3/8″ plywood
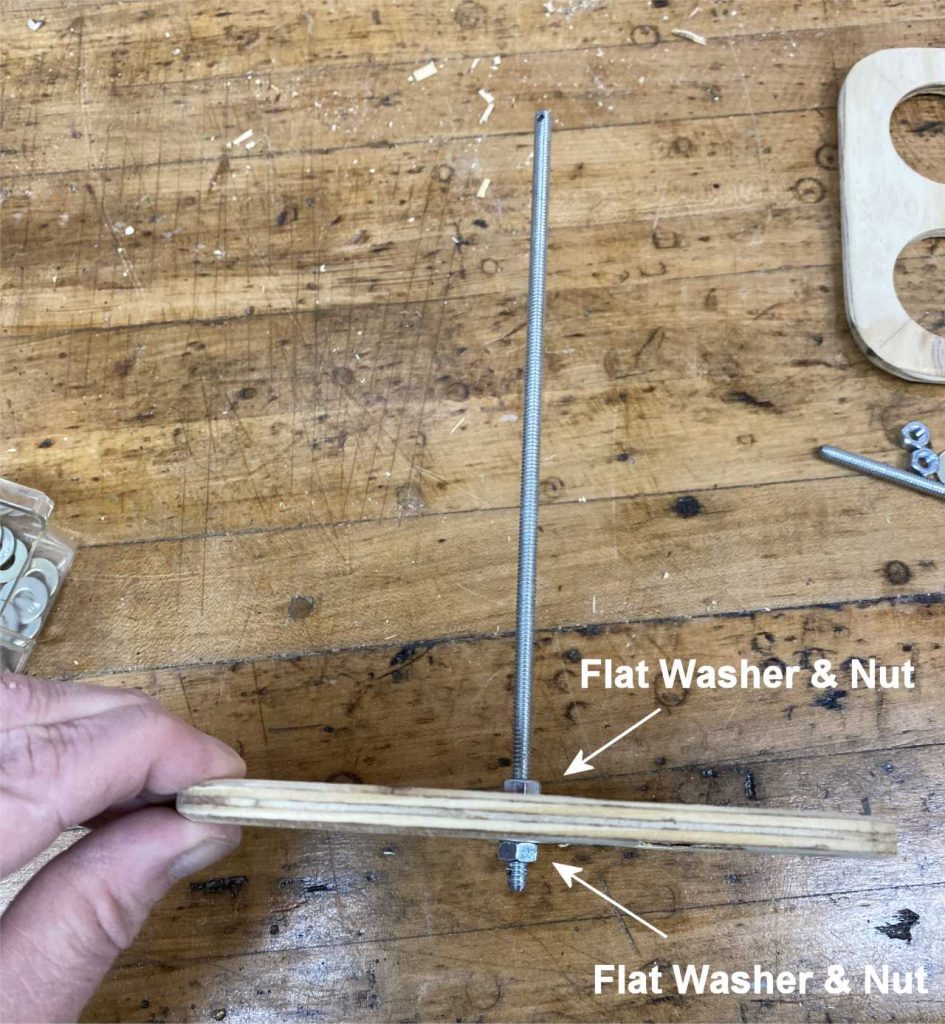
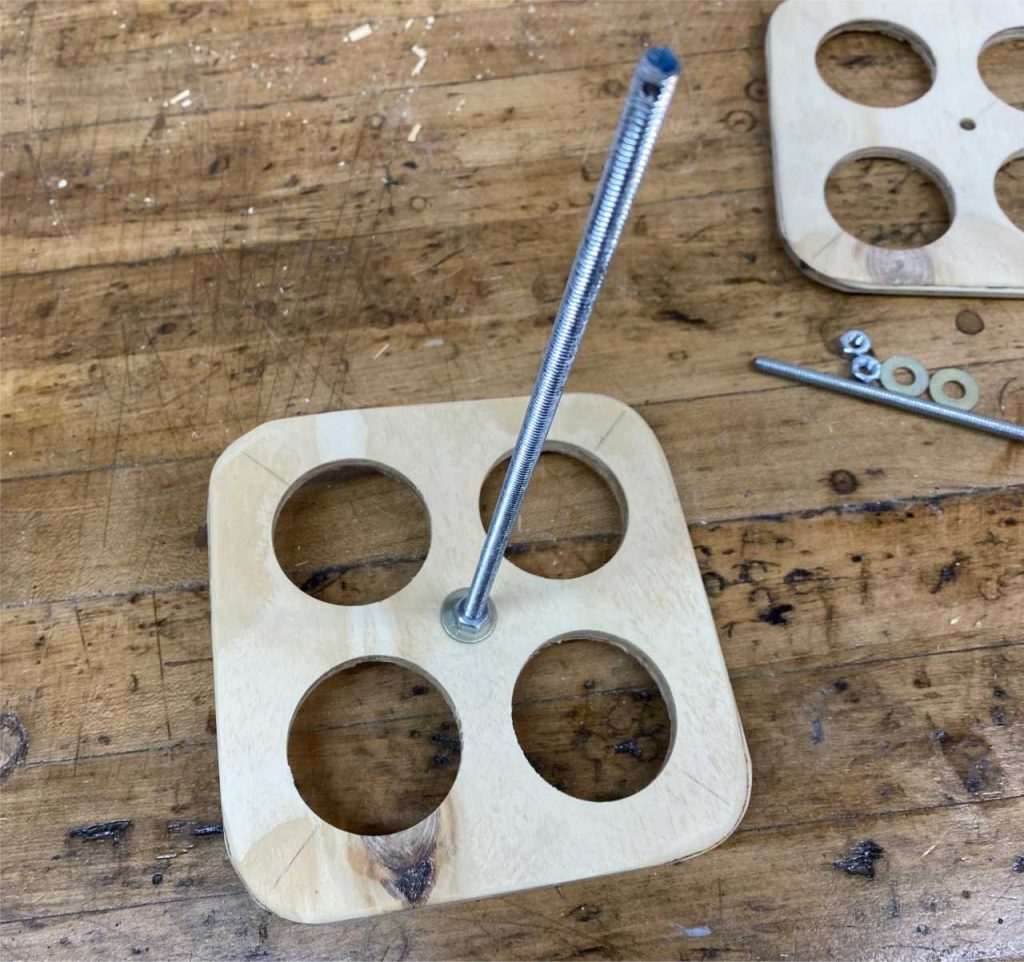
10″ 1/4-20″ threaded rod
(2) 1/4-20″ nuts
(2) 1/4″ flat washers
Orange spray paint
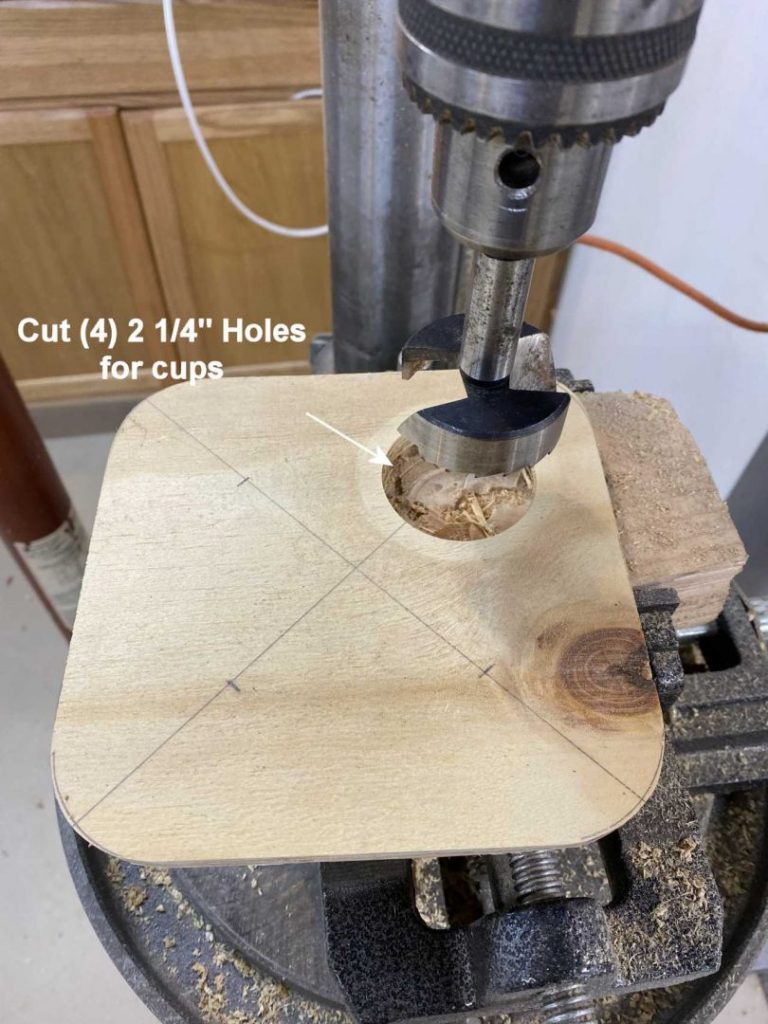
Small 2 1/2″ plastic cups from Dollar Store
Note, we purchased the threaded rod, nuts, and washers from our local Tractor Supply store.
Step 1 - Cut 3/8" plywood to 8" x 8"
Step 2 - Round corners
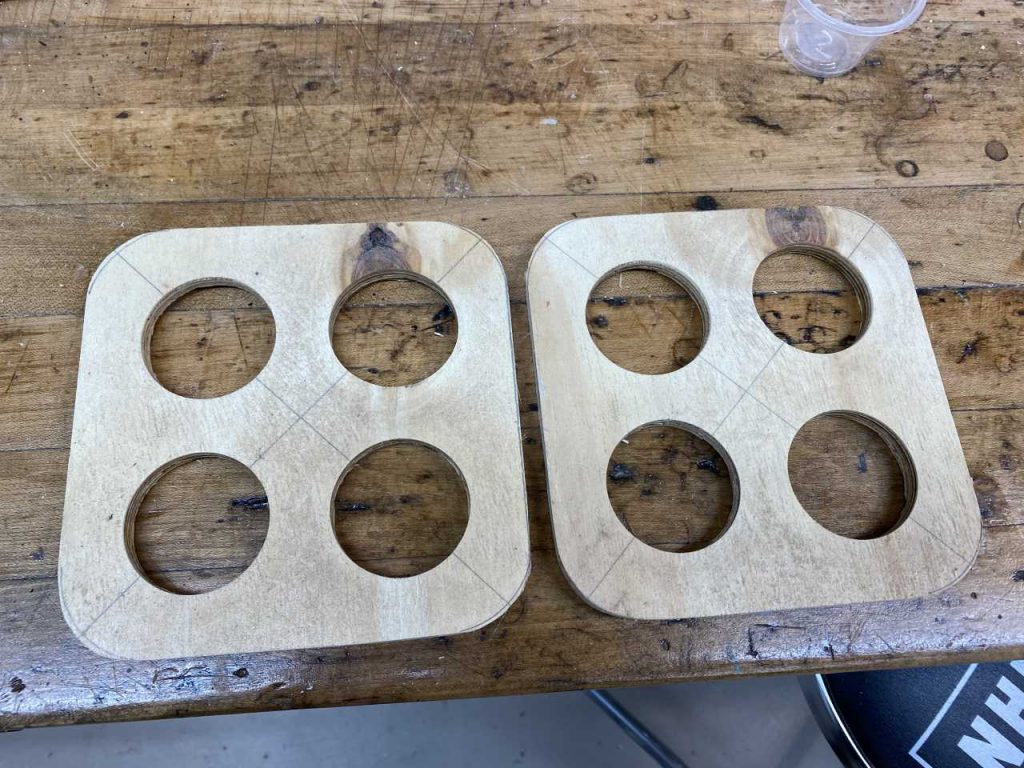
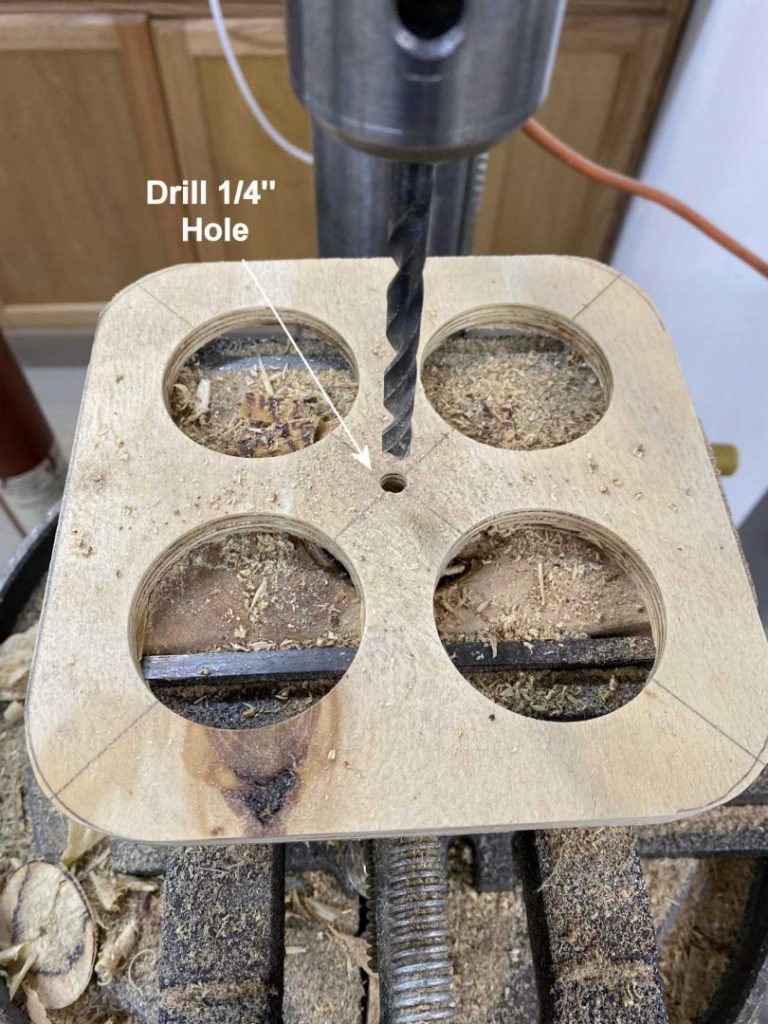
Step 3 - Cut (4) 2 1/4" holes for cups
Step 4 - Drill 1/4" hole for hanging rod
Step 5 - Round edges in plywood and start assembly


[…] Make a Baltimore Oriole Feeder […]