Live Streaming To YouTube
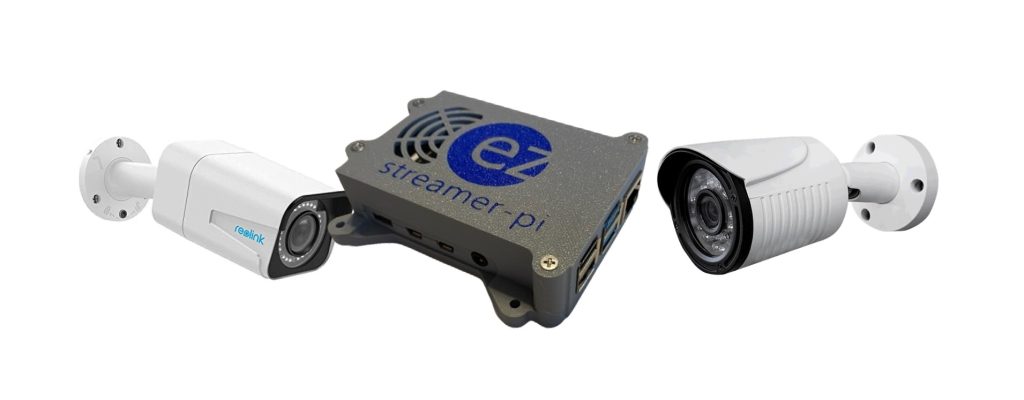
EZ Streamer-Pi is a dedicated RTSP live streaming encoder using a Raspberry Pi single board computer. Connect any IP camera with H.264 or H.265 compression and supports RTSP protocol (Real-Time Messaging Protocol). Stream to any streaming player service supporting RTMP (Real-Time Messaging Protocol) such as YouTube, Facebook Live, and Twitch.
How to Live Stream to YouTube
Step 1
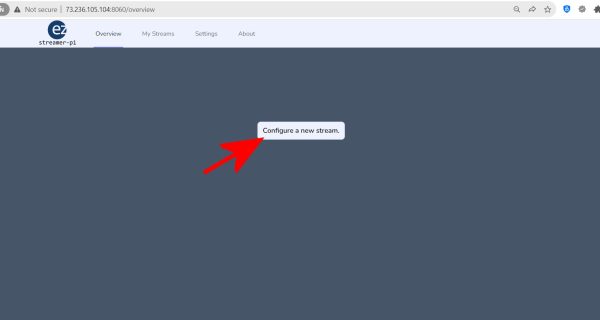
Bring up a browser and go to your EZ Streamer-Pi local IP address and click on the “Configure a new stream” button.
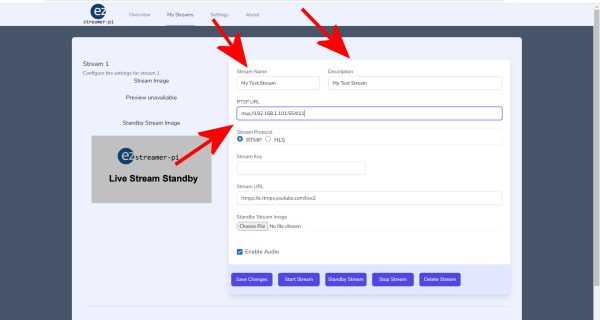
Enter a name and a description of your new live stream. Next, enter the stream URL into the “RTSP URL” box of your IP camera. This will start with “rtsp://”. The format of the RTSP link is typically provided by the IP Camera manufacturer. You can also visit https://www.ispyconnect.com/cameras for help finding the RTSP link of your IP camera.
Example Camera RTSP Link Format
This is a common format for the RTSP Stream URL, but each camera typically has its own format:
rtsp://username:password@IP Address:RTSP Port/stream0
Example of a camera with the IP address of 10.1.10.133 on RTSP Port 554 with the username “admin” and password “mycampassword”:
rtsp://admin: mycampassword @10.1.10.133:554/stream0
NOTE: In the camera settings please set the streaming protocol to H.264, enable the audio, and set the bitrate lower than 4,000 bits/second. Be sure to set a static IP address for each camera so this will be consistent for the RTSP link of your EZ Streamer-Pi. If you plan to use H.265 format then you will need to stream to YouTube’s HLS player.
Step 2
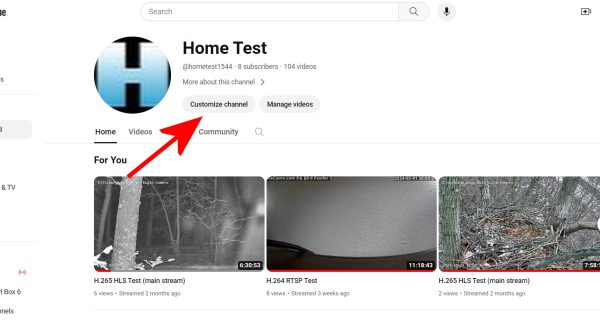
First, go to your YouTube channel. If you do not have a YouTube account, you will need to create one first. After you log into your YouTube channel press the “Customize channel” button.
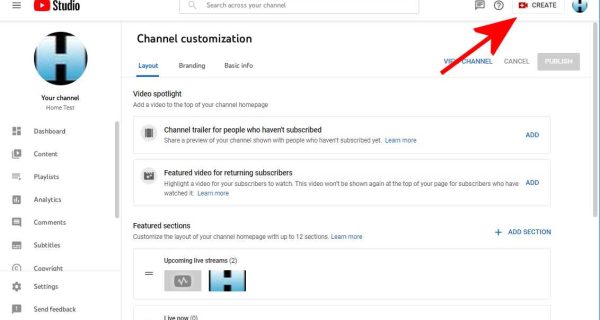
Next, press the “CREATE” button.
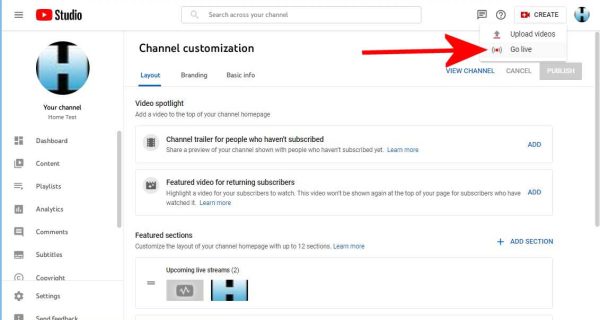
Select the “Go Live” option
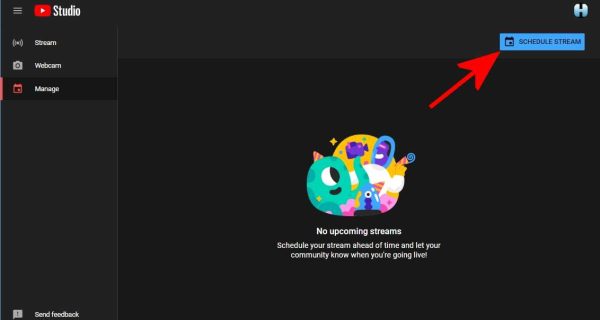
Next, press the “SCHEDULE STREAM” button.
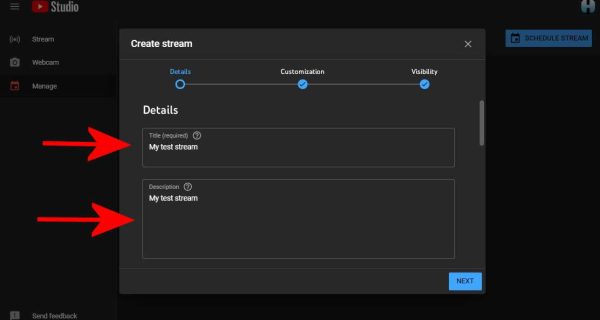
Enter the Stream Details of the Title and Description, once complete press the “NEXT” button.
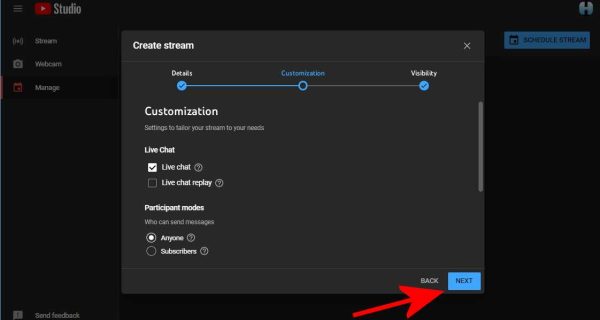
Enter the Stream Customization details and press the “NEXT” button when complete.
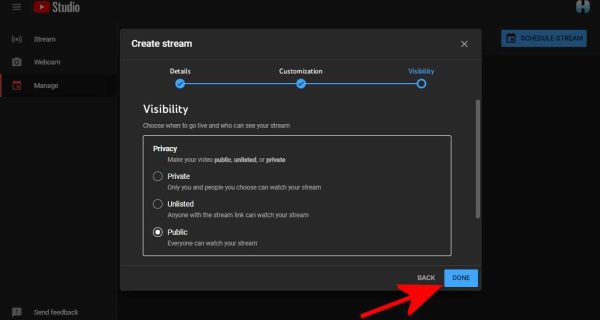
Enter the Visibility details and press the “DONE” key when complete.
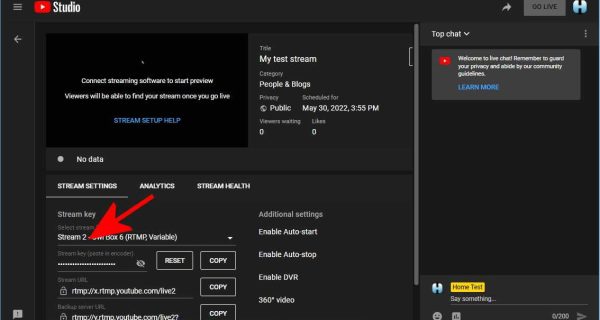
Select the “Stream Key”
Create a new stream key and enter the title and description, then press the “CREATE” button.
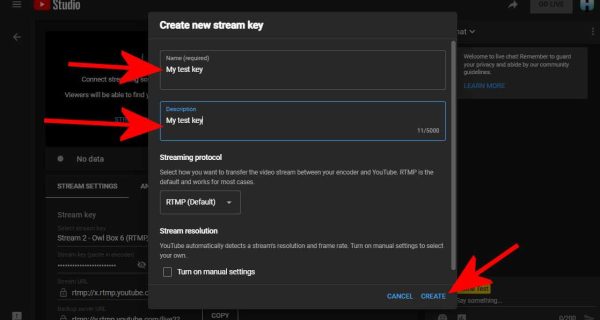
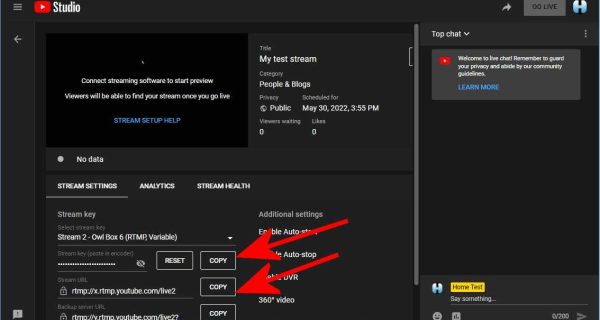
Once complete you need to copy the “Stream Key” and “Stream URL” and past those into your EZ Streamer-Pi Stream Key and Stream URL in Step 3.
Step 3
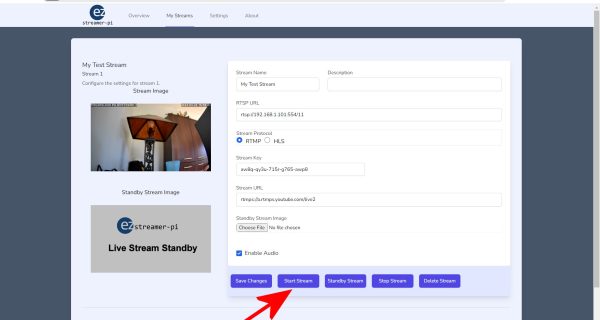
Copy the “Stream Key” and “Stream URL” and past those into your EZ Streamer-Pi Stream Key and Stream URL from above.
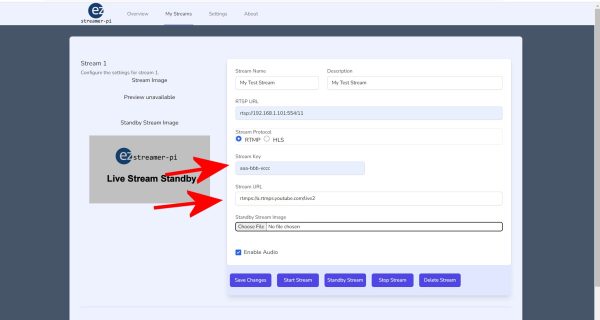
Once copied press the “Save Changes” button. Wait for the EZ Streamer-Pi to respond.
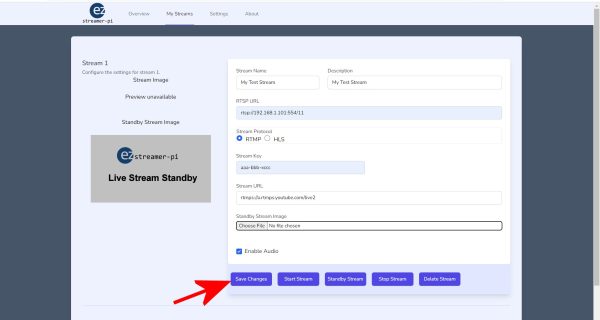
Next, press the “Start Stream” button.
Step 4
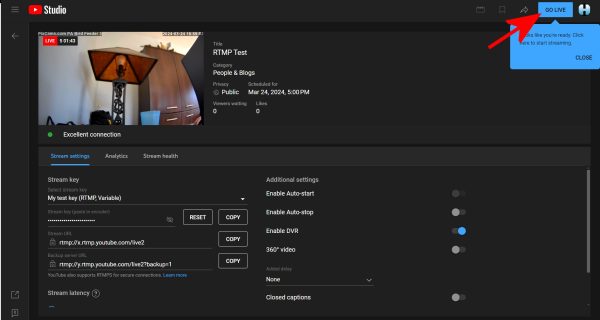
Go back to your YouTube page and you should see the stream appear. This can take several minutes. Once the stream is established the “GO LIVE” button will turn blue. When this happens press that button.
Complete!
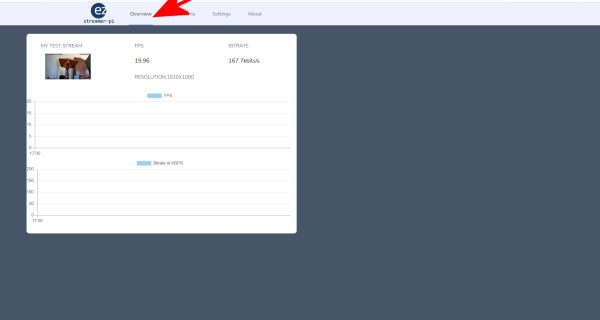
Congratulations! You have successfully started your first YouTube Live Stream! If you go to the “Overview” button on your EZ Streamer-Pi browser page you will see a display showing the frame rate (FPS) and bitrate of your live stream. this data will be graphed ever one-minute on the graphs below to monitor the stream health of your live stream.
